A "Corny" Adult Beverage Substitute

Hey Boos! Happy Halloweeeen ya' Goblins and Ghouls!   

As promised, I've got a special Hallo-treat for y'all today.  And unlike yesterday's post, I was able to successfully execute this project upon my first attempt which means you easily can too!  Che-che-che-check it out: 

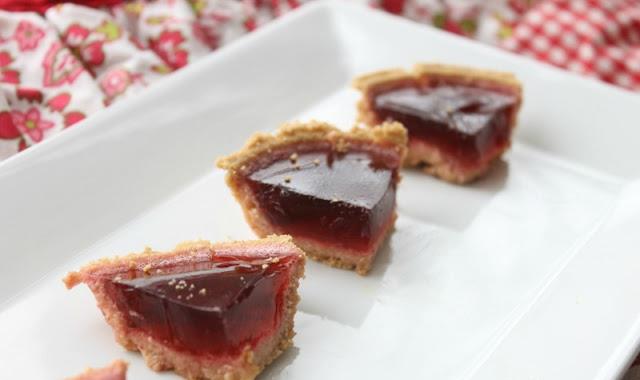
CANDY CORN JELLO SHOTS
flavored like orange creamsicles (lip smack).

Candy Corn Jello Shots.jpg

I need to give ALL CREDIT for these titillating treats to the jello shot genius herself, Michelle, from the popular blog "That's So Michelle."  While these "shooters" are my personal fave, Michelle, has crafted all kinds of delectable and CLEVER jello shots for really any occasion you can imagine:

WATERMELON LIME JELLO SHOTS 

Watermelon Jello Shots with Lime.JPG
                                                                     There…

                                                                     There's a pumpkin pie jello shot too!

Strawberry Margarita Jello Shot.JPG
Gingerbread Men Jello Shots.jpg
And for the hard core folks: 

 RED BULL VODKA JELLO SHOTS

Red Bull Vodka Jello Shots.jpg

THERE ARE ABOUT 30 DIFFERENT RECIPES! (WHY AM I YELLING?)... You can view all of That's So Michelle Jello Shots here.  

I know jello give some people the heebie jeebies and for others, the mere thought of jello shots can scare the bejesus out of them (which: don't be fooled by these tasty suckers, they have almost a whole bottle of Pinnacle whipped cream flavored vodka inside... so proceed with caution if jello shots tend to make you do CRAZZY things... that's definitely not me :).  Therefore, if you are in one of the two aforementioned categories, if nothing else, make any of these jello shots and bring them to a party and you will be the hit of the event.  I know from personal experience. 

To learn how to make these Halloween show-stoppers, from the master of the jello shot by clicking here.

But first: PROOF.  

Candy Corn Jello Shots Thats So Michelle.JPG
Whipped Cream Vodka Jello Shots.JPG
Halloween Jello Shots.JPG

That I actually made them correctly (last year).

Thank you for indulging that shameless redemption. 

Hope if you're doing the whole "Halloween thing" you have fun tonight!  I may be too old to participate but I'm doing it anyway.  Look for me on the streets of Hermosa Beach dressed as a "Senior" from the movie Dazed and Confused.  I'll be lookin' sumtin like dis:

images-1.jpeg

I'll probably be wearing that goofy face too.  Or, in a best case scenario, I'll be looking this cool. 

Dazed-Confused-Seniors-Girls.jpg

Ok for reelz, though, have fun.  Over and out. 
Related Posts Plugin for WordPress, Blogger...

PINTEREST FAIL

So, I should probably submit this to the "Pinterest Fail" blog but I'm going to expose it here instead.  However, there's one thing you need to know first off before I begin down this storytelling trail: Despite my "Risott-O-Lantern" post, I hate carving pumpkins... Oh come on, don't hate on me for not wanting to spread Halloween cheer.  I'm not so opposed to the "scraping out" part as much as the "carving a design" aspect.  I've spoken about my perfectionist tendencies on here many a time, so I won't go into all that but basically, pumpkin carving has all the ingredients for a perfectionist's Hallow's Eve nightmare.  This is due in part because I find most of the typical pumpkin designs that have tracing sheets, distasteful (no offense to anyone that likes them) thus causing me to go for the seemingly safe bet of just carving out words (for example, "Boo" or "Trick Or Treat", etc).  But don't be fooled! It's a classic Halloween trick. On more than one occasion, I have been that lone last carver, sitting in the kitchen at the carving party, carving my Halloween phrase of choice well after everyone has finished.  I have to sit, listening to their jubilant chatter oozing with the satisfaction of knowing they're done and enjoying the provided wine and tasty bites while I slave away on a pumpkin that in the end looks like crap and ends up in the dumpster outside the party.  It's a recipe for a cauldron of disaster is what it is. So this year, when I got an invite to pumpkin carving, I decided I had had enough and got proactive.  I went immediately to Pinterest and searched for "no-carve pumpkins."  And let me tell you, what the search returned was a collage of amazingness.  There are so many freaking creative people out there!  Here are some of my favorites: 
                                         &nb…

                                                               Pendleton-Inspired Pumpkin Tutorial

Or this smorgasbord:

                                         &nb…

                                                                  I stole this from HERE

But I had to choose just one, since the whole point of this venture was to not get overwhelmed + discouraged, so I finally settled on this one: 

                                         &nb…

                                                                 You can find the tutorial here.

 That black and orange one in the back that says "Trick or Treat," to be exact.  That "Smell My Feet" one kinds of falls under that "distasteful" label for me... but again, that's just me!

I considered blogging about something different today after my "no-carve pumpkin" showed it's true colors and sucked but then I thought: No!  That is not who I am.  I am a transparent person.  I am not going to let a little pride get in the way of some helpful trial-and-error tips for my readers!  So, the ruse (if there ever was one is up), I'm not as "krafty" as I may purport to be!

Here's what it turned out as...  

No Carve Pumpkin Pinterest Fail.JPG

L.A.M.E. 

I never intended to just handwrite "Trick or Treat" like a punk on my pumpkin but I did learn three things which I will share with you all if you decide to give it a go:

1. Sidewalk Chalk is NOT the right kind of chalk to use.. You want to get the slender, teacher chalk, if you can. 

No Carve Pumpkin Chalk.JPG

2. Taping a stencil to your pumpkin with Scotch tape will take off the paint wherever you put the tape (I "conveniently" didn't take a picture of my pumpkin's backside but trust me when I tell you it's covered with splotches of the pumpkin's underside).   I would recommend using painters tape or perhaps masking tape and waiting 30 min to take it off as they suggest in the tutorial.

3. Get your stencil in order/read ALL of the tutorial's directions/don't assume you know everything.  I'm ashamed to admit I printed out the words "Trick or Treat" that I found somewhere in Google images and thought I would cut it out when I got there... It took me 20 min just to cut out the first "T."  Hence the giving up part and just free-handing it.  (Now that I'm writing this post, I see that they recommended tracing your stencil with a pen over your pumpkin so that when you remove your uncut stencil, there is an indentation in the pumpkin so that you can see where to trace... That is a very good idea.  I only wish I had seen that before now.)

                                         &nb…

                                                                     Good intentions...

ALL OF THESE "TIPS" COULD BE CONDENSED UNDER THE ONE PIECE OF ADVICE OF: READING ALL OF THE DIRECTIONS.   (Moral of the story).

Sorry if you feel "tricked' by reading this in thinking that this was going to be a post of value no-carve tips but I promise I'll give you a "treat" tomorrow to make up for it.

HAPPY ALMOST HALLOWEEN! 

Related Posts Plugin for WordPress, Blogger...

Signet, Seal, Delivered.

In one of my college classes there was this cool older girl that would sit next to me sometimes when we were in class and I would always ogle this ring she wore.  Finally, towards the end of the semester, I got up the courage to ask her where it was from (intent on purchasing immediately after class ended).  But of course, she informed me that it was a family heirloom and therefore, could not tell me where it could be purchased (FAIL).  The ring was silver and had a small circle on the top of it with the letter "M" engraved into it (apparently it's called a "signet" ring.. I just learned that).  She also told me that, in addition to serving as sexy hand candy, the ring could act as a wax seal for a letter.  Um.. what??  I remember I was GREEN with envy in that moment, but after a pathetic attempt of trying to find one for myself, I gave up and forgot all about it.  (Oh, the whims of early adulthood...)

That is, until a few years ago, when I saw the most incredible ring on one of the fashion blogs I "read" (see: look at), called Atlantic-Pacific.  The main girl, Blair, the star of the Atlantic-Pacific blog, wears the most insanely cool outfits, takes photos of her wearing these outfits and then tells you where she got all of the items.  I'll be very surprised if this post is the first you're hearing of her (but if it is, I shit you not, you will spend HOURS on there... So goodbye for now).   Anyhoo, the ring she had on in one of her photos was this totally dope three letter monogram square gold ring.  

Atlantic Pacific Blog Monogram Ring.jpg

And this time, my research lead to success (which was practically a given since I was basically spoon-fed the link to purchase it).  And purchase it I did!  (Actually I asked for it for an xmas gift and got it but who's counting.. Err, thanks Mom! :). 

                                         &nb…

                                                    Buy it here

And it is still, more than ever, a staple of my wardrobe.  BUT my ring cannot double as a wax seal and I still haven't given up on one day getting myself one of those too.  So here are some monogram and/or wax seal rings that certainly have my "seal" of approval!

                                         &nb…

                                                   1 | 2 | 3 | 4 | 5 | 6 | 7 | 8 | 9 | 10 | 11 | 12 | 13 | 14

Clearly I had a hard time editing and I do just want to say that I did try to make that "round up" not look tacky.. but alas, I could not.  I did, however, go ahead and do some leg work for you though, and figured out that a monogram ring with any of the following letters could also be a wax seal since it would read the same front and back... What up, ANAGRAMS?!  Here are the lucky letters:

A, H, I, M, O, T, U, V, W, X, Y

Also speaking of monograms.. and cool girls, check out this blog post about my monogram glasses and my post on giraffe manor, here.  This blog, It's The Little Things, is both adorable and hilarious and you would be silly not to give it a gander.  Also, the post on Giraffe Manor reminded me that I wanted to show you guys these totally ridic shoes: 

Giraffe Stilettos Shoe.jpg

I'm getting a pair in a size 8.

Bahahaha, JUST KIDDING!  

-xoxo

Related Posts Plugin for WordPress, Blogger...

Zig Zag Zisters

I'm in the throws of giving my boudoir a little makeover but am not quite ready to show you guys any of that just yet, so hold onto your horses! Geez!  However, I will give you a little teaser:  It involves this going over my bed + headboard setup...

                                         &nb…

                                                See more photos, here.

Pretty WILD, right?!  It's either going to look out of control rad or kinda weird.  Cross your fingers for me for the former.

Another upgrade I'll be doing is painting over the wallpaper on this wall:

Wallpaper Nook.JPG

Ok, full disclosure: that "wall" is not actually wallpapered... a wood board that was cut to be the same size of that wall was wallpapered AND most importantly, I no longer live in that room with that nook, so "that wall" we spoke of, no longer exists in my life. 

You see, I designed the project specifically for that nook space and since it was a rental unit that I was living in at the time (I'm still living in a rental unit, just a different one), I wallpapered a board to mimic a wall so I wouldn't have to take off the wallpaper (and essentially waste it since, if you know about wallpaper, it's not exactly cheap) and have to repaint over it when I moved out (because, just moving in and of itself is enough to drive a girl insane!).  So when I moved, my wallpapered board came with me... to a room with no nook.  And there is sits, leaning up against a wall, being all awkward like the wallflower it is.  And that outdated wallpaper isn't helping the situation.  BUT that's all about to be rectified REEEL soon! 

Here's what I had in mind... I'm going for kind of an exotic beachy feel which is all inspired by that tent I showed you "up there."  I wanted the color of the "board" to match the orange tassels on the sides of the tent to bring that color out more and I figured the most reliable way to ensure a close color match was to paint it.  So I got some paint samples and employed my "best-guess" color matching system to pick a color.  But I'm not one for just painting the board and calling it a day, especially when it's going to be covering up such detailed wallpaper, so I've decided on the following design for the board: 

Yellow Herringbone Wallpaper.jpg

 (And just another quick teaser:  I recently purchased this mirror and am painting it a glossy white to replace that IKEA staple framed mirror that I'm sure you've seen... EVERYWHERE). 

But instead of yellow, a peachy-orange color will fill those "blocks" of color to create a chevron pattern... or wait, is that actually a herringbone pattern?  While for many sane people, of which I am not one, figuring out the pattern would have been just dandy and they could've called it a day but for me and my overly-inquisitive, need-to-label-things mind, I had to find out: was I going to have a chevron wall or a herringbone wall?  Even though I couldn't have told you the difference between a chevron or herringbone pattern prior to 72 hours ago, I suddenly needed to know what my wall was going to be (we will NOT bring up the fact that I am actually trying to sell both a herringbone patterned chair AND a chevron patterned chair in my shop both "aptly" described and named that by your's truly).. And so the search began (I'm simply assuming you all don't know the difference either because the internet paints a picture that the difference is not well known). 

In this case, "a picture is worth a thousand words" so I will let these two examples do the talking:

Chevron vs Herringbone.jpg

The best analogy I came across was that Chevron and Herringbone are siblings but not twins.  Couldn't have said it better myself!

Now, my blogger research tells me that one of the ways I can increase blogger engagement is through "gaming" so we're going to have a little "quiz" (just like we did here).. But don't worry guys, it's just for fun and the answers will be posted at the bottom so that no one even has to know if some of these optical illusions prevented you from getting your perfect score.  (The wall pattern I'll be doing on my wall/board is "Chevron" btw).   Here are five examples for you to decide if they are herringbone or chevron:

ONE

Herringbone Floor with Chevron Paint.jpg

TWO

Chevron Wallpaper 2.jpg

THREE

Chevron Wood Floor.jpg

FOUR

Herringbone Floor Wood.jpg

FIVE

Chevron Backsplash.jpg

ANSWERS: 

(1) H (2) C (3) C (4) H (5) C

But frankly, as far as I'm concerned, you're all winners in my book!  Now go out and kill it this week!  

Related Posts Plugin for WordPress, Blogger...

Bobby Pin Hair Art

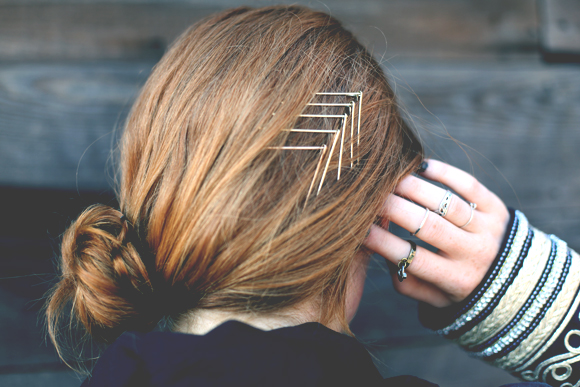
I've never been what you would call a "hair person."  I've had the same hairstyle that I have currently, since I started really caring about my hair in 6th grade.  However, I do think I at least have the wherewithal to spot something cool when I see it (even though I'm not going to claim I know how to do it).  So, when I saw this picture on Pinterest (where else?), it prompted me to take to the internets for some investigative work into creative ways to use bobby pins. 

Bobby Pin Hair Art.jpg

It also made me a little curious about how long the bobby pin style as we know it has been around, so I looked into that too: 

Bobby pins (known as a "kirby" or a "hair grip" in the U.K.)  have been a "thing" since 1899!! They really became popular in the 1920's, however, as the bob cut or bobbed hair trend took off and ladies needed something to keep their bobbed hair in place.  The term "bobby pin" became kind of a "slang" for "bobbing pin." 

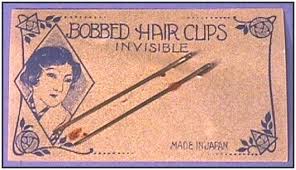
The closest example I was able to find of what the original pin looked like was this: 

The Original Bobby Pin.jpg

While it appears their design has been altered a little (or does it?).. They mustn't have needed too much adaptation because, from what I see, they are still getting the job done in a way no other barrette can! I guess if it ain't broke, don't fix it! 

I am actually a big user of bobby pins (for functional purposes only though) and also found out from my researching, that I have been using them wrong my whole life!  Did you know that the bobby pin should be pushed into place with the wavy side down ?!?!  Because I did not.  (And frankly, they still work pretty well with the wavy side up, if you ask me!)

                                         &nb…

                                                                          OOPS!

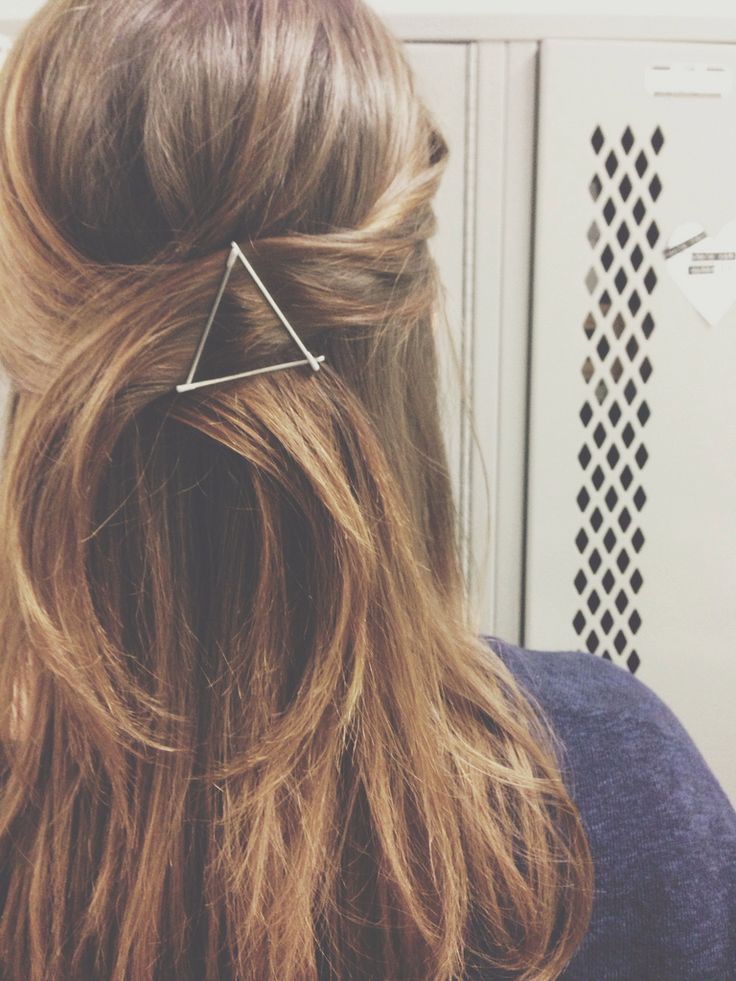
So without further ado, here are some pretty "unconventional" ways to enhance your hairdo' by way of the timeless bobby pin: 

Bobby Pin Triangle.jpg
Bobby Pin Bun Crown.jpg
Bobby Pin Arrows.jpg
Nail-Polish-Bobby-Pins.jpg
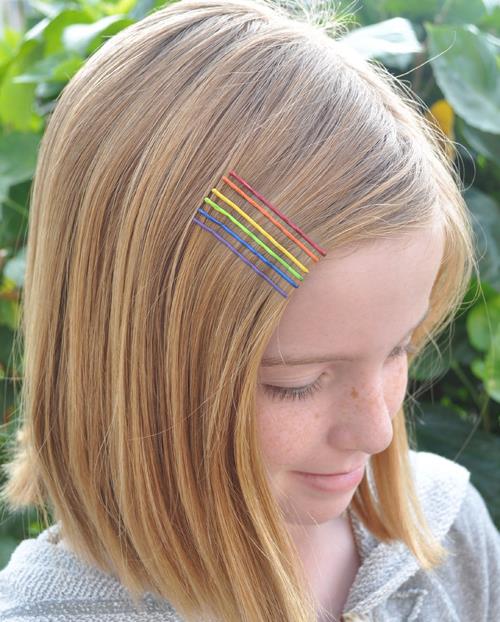
Rainbow Bobby Pins.jpg
Bobby Pin side Pin.jpg
Pearl Bobby Pins.jpg
Embellished Studded Bobby Pins.jpg
Studded Bobby Pin.jpg
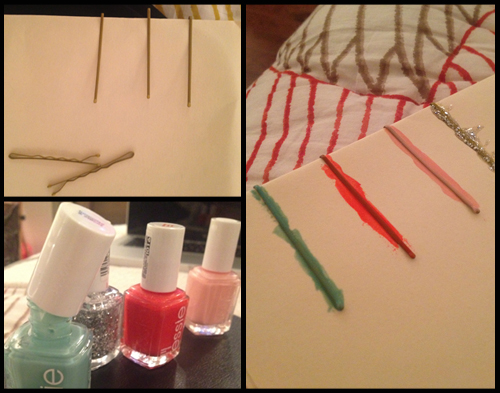
Nail Polish Bobby Pins.png
Artistic Bobby Pins.png
Bobby Pin Chain Strand.jpg
Bobby Pin Chain.jpg

Now get to work, you "krafty" beings!  And have a stu"pin"dous weekend! 

Related Posts Plugin for WordPress, Blogger...